At some point, you may want to remove an embroidered patch—whether you’re updating a uniform, replacing branding, correcting a design, or refreshing a garment for a new look. While embroidered patches are designed to be durable, removing them properly is absolutely possible with the right method and care.
This guide walks you through safe, practical ways to remove embroidered patches, depending on how they were attached.
Before You Start: Identify the Patch Backing
The removal process depends on how the embroidered patch was applied:
- Sew-on embroidered patch
- Heat-pressed (iron-on) embroidered patch
- Velcro embroidered patch
- Adhesive-backed patch (temporary use)
Always check the inside of the garment first to confirm the attachment method.
How to Remove a Sew-On Embroidered Patch
Sew-on patches are the most common and also the safest to remove.
What You’ll Need
- Seam ripper or small sharp scissors
- Tweezers
- Good lighting
Steps
- Turn the garment inside out
- Locate the stitching holding the patch
- Use the seam ripper to carefully cut stitches
- Gently lift the patch as stitches loosen
- Remove leftover threads with tweezers
🧵 Tip: Work slowly to avoid fabric cuts, especially on thin garments.

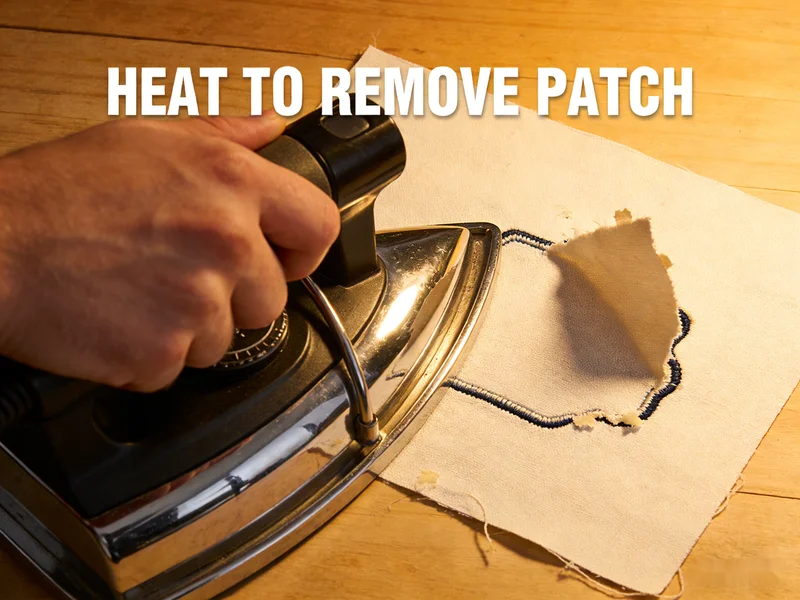
How to Remove a Heat-Pressed (Iron-On) Embroidered Patch
Heat-pressed patches use adhesive, so removal requires softening the glue.
What You’ll Need
- Iron or heat press
- Parchment paper or cloth
- Tweezers
Steps
- Place parchment paper over the patch
- Apply medium heat (no steam) for 10–15 seconds
- Gently lift a corner of the patch
- Reheat and peel slowly until removed
⚠ Caution: Excessive heat may damage synthetic fabrics.
How to Remove a Velcro Embroidered Patch
This is the easiest method.
- Simply detach the patch from the hook-and-loop backing
- If sewn Velcro is attached to the garment, remove stitching like a sew-on patch
Velcro patches are ideal for garments that require frequent updates.

How to Remove Adhesive-Backed Patches
Temporary adhesive patches usually peel off easily.
- Gently lift one edge
- Peel slowly to avoid residue
- Use mild fabric-safe adhesive remover if needed
These patches are not designed for long-term wear.
Dealing with Stitch Marks or Glue Residue
After you remove an embroidered patch, you may notice:
- Small needle holes
- Stitch outlines
- Adhesive residue
Solutions
- Light steaming or ironing helps fabric relax
- Washing can reduce stitch marks
- Lint rollers remove leftover threads
- Fabric adhesive remover for glue residue
Results depend on fabric type and patch size.
Can You Reapply a New Patch After Removal?
Yes—and many people do.
After removing a patch:
- Cover stitch marks with a new embroidered patch
- Replace old branding with updated logos
- Switch from sew-on to Velcro or heat-press patches
This is common for uniforms, team apparel, and workwear.
When You Should NOT Remove an Embroidered Patch
Avoid removal if:
- The fabric is very delicate (silk, lace)
- The patch was stitched directly through thin material
- The garment already shows heavy wear
In these cases, professional alteration may be safer.
Why Patches Are Still a Flexible Design Choice
One of the biggest advantages of embroidered patches is replaceability. Unlike direct embroidery, patches allow:
- Design updates
- Brand changes
- Seasonal customization
- Long garment lifespan
That flexibility is why patches are widely used in uniforms, sportswear, and branded apparel.
Conclusion
Knowing how to remove an embroidered patch gives you more control over your garments and branding. With the right tools and method, most patches can be removed cleanly—allowing you to refresh, replace, or redesign without damaging the fabric.
Whether you’re correcting a mistake or planning a new look, embroidered patches remain one of the most versatile apparel decoration options available.
About Author
——————————————————————————————————————————————

Alexander
Online Sales Manager
Alexander specialize in digital marketing and understanding customer psychology, providing clients with the right solutions through data insights and creative strategies.
——————————————————————————————————————————————